Upgrade Workflow
Workflow is a legacy feature for Chef Automate, which was designed for managing changes to both infrastructure and application code.
Warning
Prerequisites
Create a system which is accessible from your Automate 2.0 environment via SSH. This will have a minimum of three machines:
- Automate With Workflow - 8GB RAM recommended
- Chef Infra Server - 8GB RAM recommended
- Workflow Runner - 20GB disk space recommended
Backup
Backup your Chef Automate 1 install, to minimize the amount of data that will need to be backed up while the system is down:
automate-ctl create-backup
Upgrading
Warning
Deploy the Workflow server:
chef-automate upgrade-from-v1 --enable-workflowAfter the upgrade runs the preflight checks and analyzes your Chef Automate 1 configuration, it asks for confirmation to continue. Review the generated configuration file and if it is correct, type
yesto continue.The upgrade process backs up your Chef Automate 1 data, shuts down Chef Automate 1, imports your data to Chef Automate 2, then starts Chef Automate 2. At this point, you can use your existing Chef Automate 1 user credentials to login to Chef Automate 2. If you’ve been using LDAP for authenticating users, that configuration will have been migrated as well, and you can use your LDAP credentials to login. Historical data will be migrated in the background.
Create a workflow enterprise:
automate-ctl create-enterprise my-enterprise-name --ssh-pub-key-file=/hab/svc/automate-workflow-server/var/etc/builder_key.pub
Build a Standalone Chef Infra Server
Create a standalone Chef Infra Server following the standalone server installation.
Then, on the Chef Infra Server:
Create a ‘workflow’ user on the Chef Infra Server:
sudo chef-server-ctl user-create workflow workflow user ops@some.domain.com workflowCreating a user in previous step displays a private key to stdout. Copy this content and and save it on the Chef Automate server as:
/hab/svc/automate-workflow-server/var/etc/delivery.pemIf this is a new Chef Infra Server, create an organization on the Chef Infra Server with:
`sudo chef-server-ctl org-create workflow workflowAdd the ‘workflow’ user as an admin to the Chef Infra Server organization that you created when setting up your Chef Infra Server:
sudo chef-server-ctl org-user-add my-chef-org workflow --admin
Configure the Chef Automate Server
Set up your Chef Automate server to communicate with your Chef Infra Server by creating a
workflow.toml:[workflow.v1.sys.chef_server] url = "https://my.chef.server.com/organizations/my-chef-organization" web_ui_url = "https://my.chef.server.com/" chef_user = "workflow"The FQDN saved in the
workflow.tomlon the Chef Automate Server must match the FQDN of the Chef Infra Server (find it by enteringhostname --fqdninto your Chef Infra Server terminal) or you will have SSL certificate failures later in this process.For example, if running
hostname --fqdnfrom your Automate server command line returnsautomate-test, then that hostname will need to be in the local dns configuration on your workstation.For example,
/etc/hostswould contain a line like:192.168.0.20 automate-testApply the configuration:
chef-automate config patch workflow.toml
Login to the Web UI
- Navigate to
https://automate-teston your workstation - Login as admin, using the password from the
automate-credentials.tomlfile that was created on your Automate server withchef-automate deploy
Workflow
Access Workflow by opening the Client Runs tab and then selecting Workflow on the left navigation panel.

Selecting Workflow opens the legacy Workflow screen.

Create an Organization
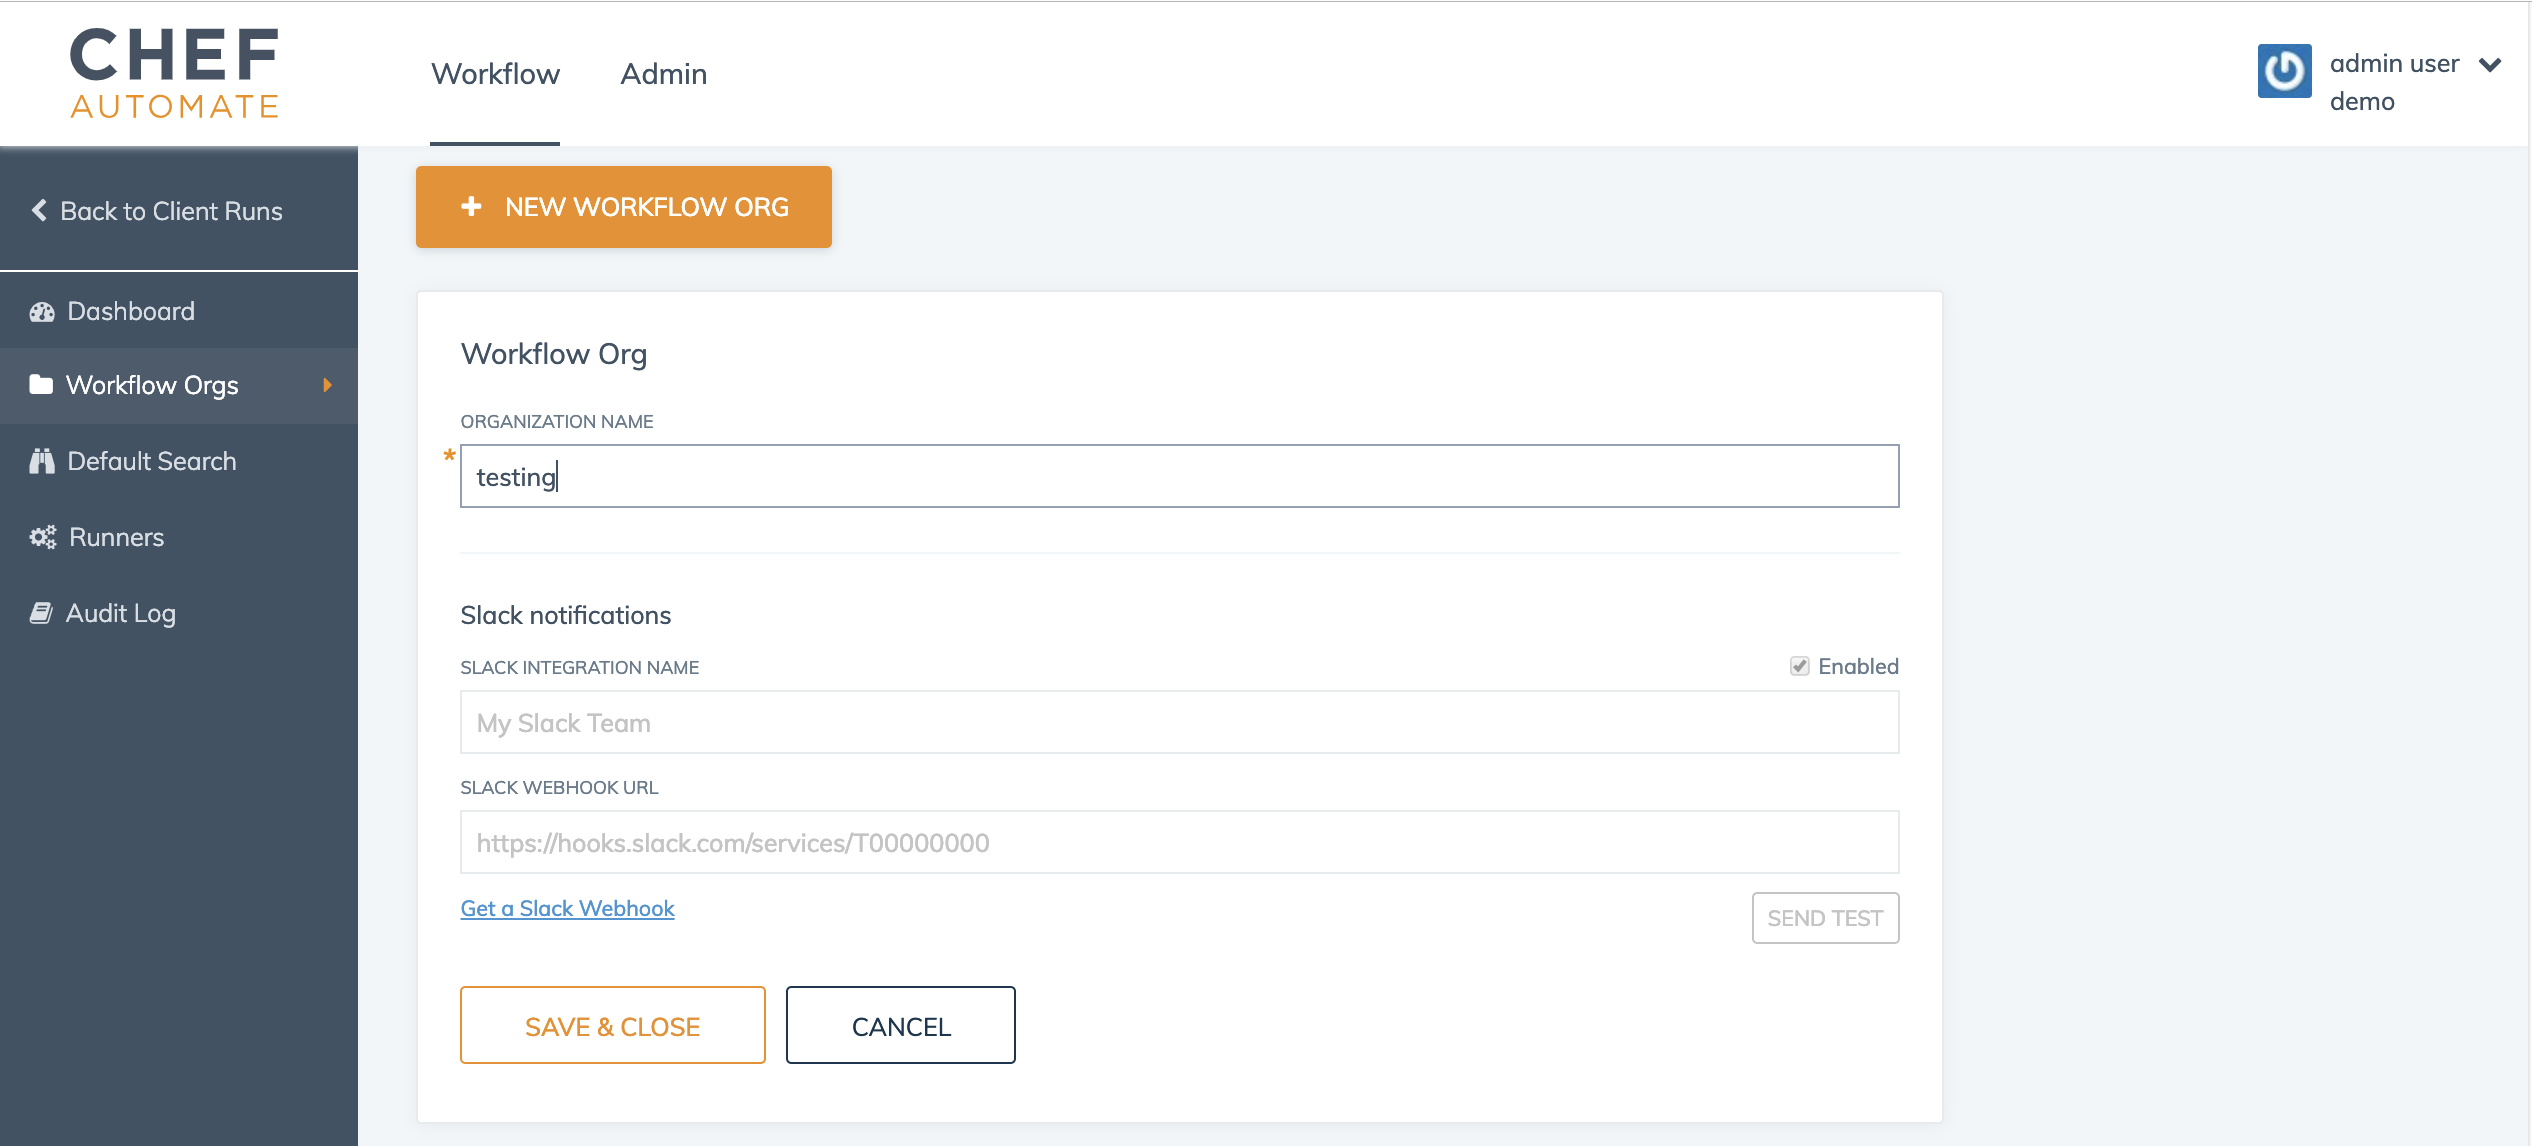
- From the Workflow UI, select Workflow Orgs on the left
- Select New Workflow Org
- Enter an organization name, for example, “testing”, and select Save & Close

Set a Workflow Admin SSH Key
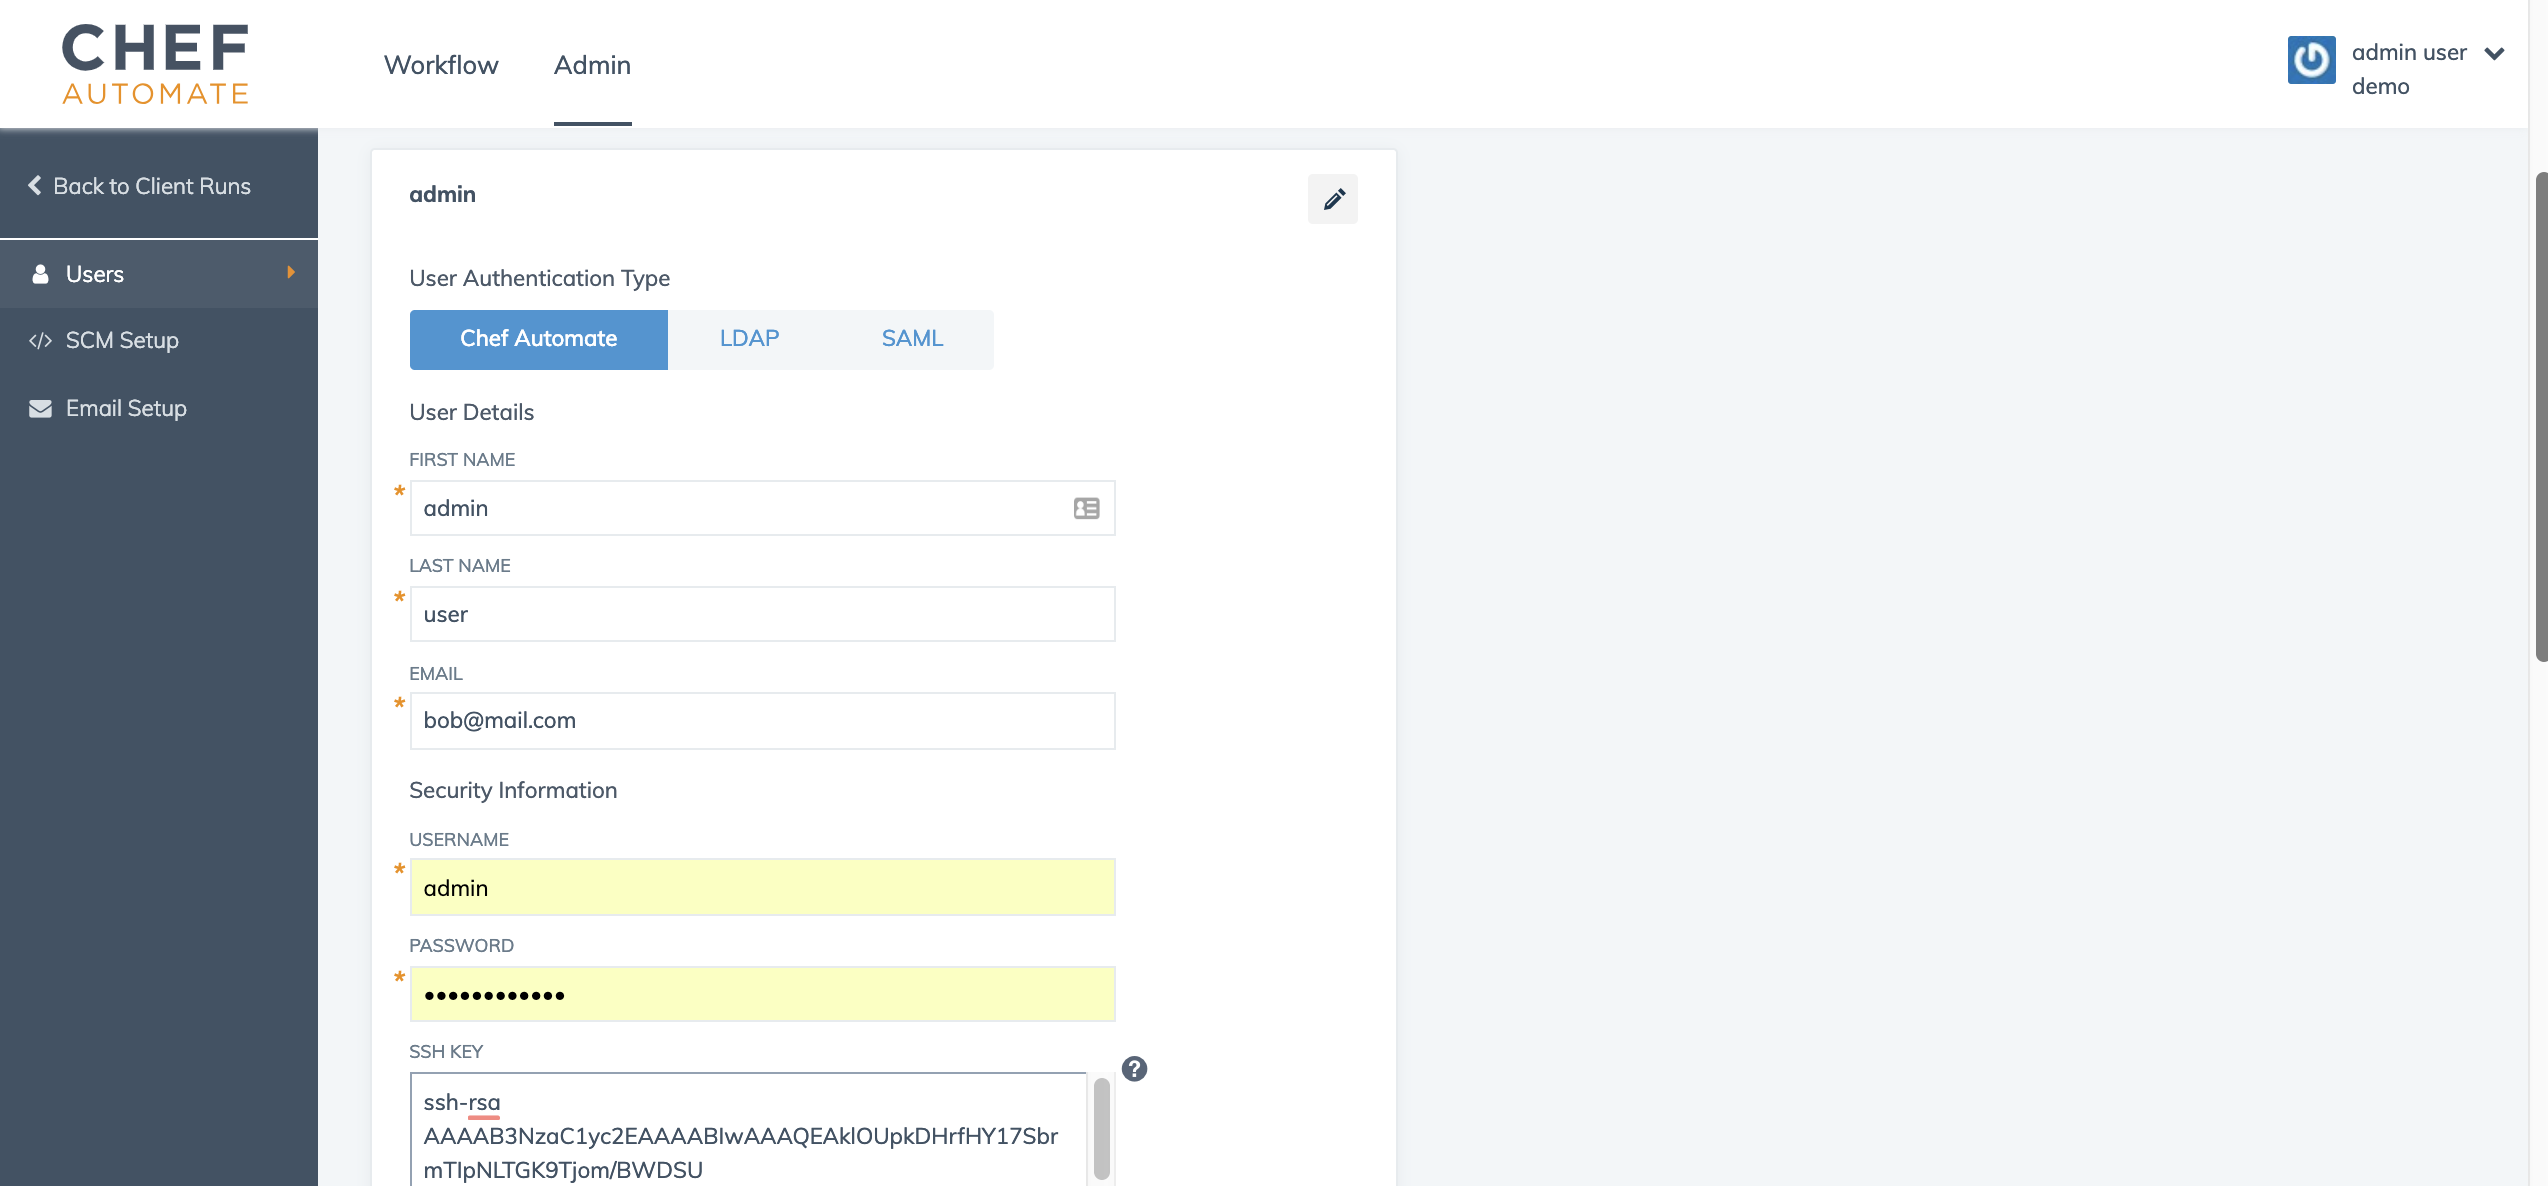
- From the Workflow UI, select the Admin tab on top
- Select the edit button for the admin user
- Enter a first and last name, and an email address
- Paste your ssh public key into the SSH KEY field
- Select Save & Close

Configure Runners
On the Runner
Create another VM that is also accessible from your Automate 2.0 environment.
Create a new user on the VM, for example, “workflow”
sudo useradd workflow -G sudo --create-homeLet new user to use sudo without entering a password, by putting the new user into the
sudogroup and ensuring this line exists at the end of/etc/sudoers%sudo ALL=(ALL) NOPASSWD:ALLCopy the SSH public key from the
/hab/svc/automate-workflow-server/var/etc/builder_key.pubfile that was made during the enterprise creation step on the Automate server to the/home/workflow/.ssh/authorized_keysfile on the new VM.Confirm the hostname and IP addresses of the Chef Automate server and the Chef Infra Servers in
/etc/hostsFor example,
/etc/hostswould contain lines like:192.168.0.20 automate-test 192.168.1.100 chef-infra-server
On the Automate 2 server
From the command line, run:
workflow-ctl install-runner my.vm.hostname.or.ip.address workflow -i /hab/svc/automate-workflow-server/var/etc/builder_keyOpen Automate in a web browser, then select the Client Runs tab, and finally, select Workflow on the menu on the left.
Select Runners from the navbar
Select Manage Runners from the page
You should see your newly installed runner, select the TEST button
Creating a Pipeline
Download the latest stable release ChefDK.
Create a new directory, for example,
delivery-test, and move into that directory:mkdir delivery-test cd delivery-testInitialize the repository with:
git initSetup the pipeline, using values from your own system:
delivery setup --ent=demo --org=testing --user=admin --server=automate-test --a2-mode- Replace “demo” with the name created in
workflow-ctl create-enterprise - Replace “testing” with the name of the organization you created in Workflow
- The user should remain admin
- Replace “demo” with the name created in
Confirm that you’re logged into the Workflow UI in your web browser
Run
delivery init --a2-modeIt will prompt for a token and open your web browser. Select copy on the page that displays the token. Return to your shell and paste the token.
Troubleshooting
workflow-ctl
For clarity, we renamed automate-ctl command workflow-ctl. Resolve the following error message:
deployment-service.default(O):time="2018-12-10T21:30:03Z"
level=error msg="Converge failed" error="failed to binlink
command "automate-ctl" in pkg "chef/automate-workflow-ser
ver/2.8.31 20181207185527" into /bin\nxxx\nxxx
'automate-ctl' was not found under any 'PATH' directories
in the chef automate-workflow-server/2.8.31/20181207185527
package\nxxx\n: exit status 1"
by making a manual binlink to the new workflow-ctl binary with:
$ hab pkg binlink chef/automate-workflow-server workflow-ctl -f
Public Key Error
If delivery init --a2-mode results in:
Chef Delivery
Creating Delivery project...
  Skipping: Delivery project named wftest already exists.
Setting up the 'delivery' git remote...
  Skipping: The delivery git remote is up-to-date.
  (ssh://admin@automate@a2-dev.test:8989/automate/rupert
  /wftest).
Pushing initial git history...
\The authenticity of host '[a2-dev.test]:8989
([127.0.0.1]:8989)' can't be established.
RSA key fingerprint is
SHA256:L+6QhMbxVD3I8Z3yCN1sUKbKbWGHEGjjBmyP71g0WdA.
Are you sure you want to continue connecting (yes/no)?|-\-
Git command failed!
STDOUT:
STDERR: Warning: Permanently added '[a2-dev.test]:8989'
(RSA) to the list of known hosts.
admin@automate@a2-dev.test: Permission denied (publickey).
fatal: Could not read from remote repository.

Please make sure you have the correct access rights
and the repository exists.
You may need to add the private key associated with the ssh public key for the Workflow admin in the UI:
ssh-add -K ~/.ssh/<ssh private key>
Known Issues
- Authentication times out after three minutes if you don’t keep a browser window open on Chef Automate.